Table of Contents
Custom rubber stamp printing on the fabric is something you can choose to do to add a creative touch to your fabric. because you yearn for more variation in your designs, just like everything else in life.
When you create your own stamps, you have complete creative control over the style, size, and colour of the stamps, as well as their complexity or simplicity.
You use custom rubber stamps for any gorgeous design on textile in as many different colours and repetitions as you like.
The use of custom rubber stamps on fabric printing
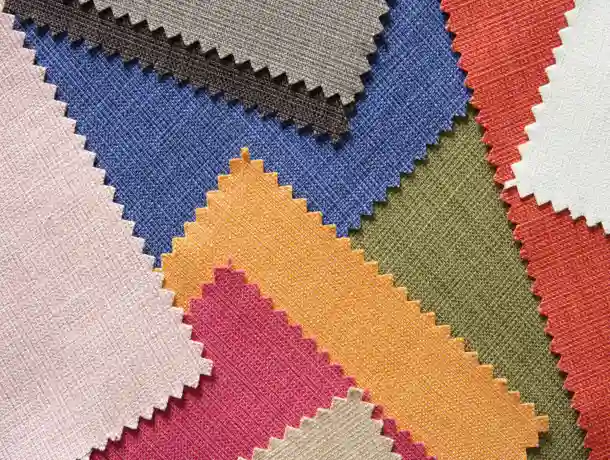
- A piece of fabric may have a consistent pattern all over or irregular, random motifs spread out in uneven repetition.
- Keep a backing paper or piece of plastic underneath the area to prevent ink from transferring, especially if it is clothing. As said, the fabric must be stamped on a level, strong surface, but it must not be too hard. A thin foam mat placed over the hard, level surface would work well.
- To evenly coat your fabric stamp, use an ink pad that has been saturated with fabric ink. A piece of felt fabric or even a piece of sponge can be used as an ink pad. Use a sponge roller or rubber brayer to apply the paint if the stamps are large.
- Keep the inkpad closed to prevent it from drying out quickly and becoming ineffective. To ensure that the custom rubber stamps applies paint to the surface uniformly, use a strong hand. A solid handshake or a solid roll with a roller are both worthwhile attempts.
- If you are using multiple layers, wait until the first one is completely dried before applying the second. Typically, one color is used while using separate stamps.
- The fact that you can create with so many various materials is one of the best things about stamping.
Resources Required
- A piece of fabric, custom rubber stamps, and fabric ink are all you need, apart from that you may require materials for a precise fabric stamping experience.
- In the same way, you should begin each fabric stamping job by gathering all of the necessary supplies.
- Fabric: Although it depends on your choice, fine, tightly woven fabrics are ideal.
- Custom rubber stamps – Avoid using small stamps with fine features because they may disappear during the stamping process. It’s recommended to select a fabric stamp or a personalized stamp with a wider pattern for fabric stamping. The best patterns to start with are geometric patterns like triangles, lines, and squares.
- Fabric ink – there is a wide range of fabric inks to choose from, you can select based on your colour preferences.
- A scrap of cloth: Use this scrap of cloth to test your pattern by stamping designs on the fabric. To maintain consistency, pick a piece of the same material that you’ll be using for the project.
- Paper: To shield your workspace from stray fabric ink.
Different Fabric Types
Keep in mind that ink bleeds onto fabrics, even fabric ink. The amount of bleeding will increase with the size of the fabric weave. Therefore, it is always ideal to select textiles with a tight weave, like cotton or linen. The fabric ink colour will also show up better if you choose a light-coloured fabric. Before applying your ink on something you truly like, always be sure to test it out on the cloth.
Making a Good First Impression
- You need to apply a thin, even layer of fabric ink to the stamp for a good impression. The custom rubber stamps you select should have a few small details and be larger. Take the scrap of fabric we discussed earlier, and practice stamping your pattern on it.
- Put that scrap of fabric away once you’ve finished your stamped pattern and get your actual piece of fabric. Make sure to apply even pressure while pressing firmly on the stamp. Do not move it or jiggle it. When you’re finished, simply pick up the stamp and proceed!
- When utilizing numerous stamps, it is advisable, to begin with, the largest custom rubber stamps and work your way down to the smallest one. This will allow you to fully utilize the negative spaces that the larger custom rubber stamps leave behind. You can make use of custom rubber stamps for giving distinct and unique patterns to your fabric.
Advice and Methods
The following general advice will assist you in creating a stamping project that you can be proud of.
- Beginning fabric stampers should start with pre-made or easily cut stamps, such as stripes, triangles, and squares. Bold stamps are simple to love and are difficult to get wrong.
- Make your pattern simple initially, and take pleasure in the process.
- With the right colour, any form or stamp design can be as enjoyable as you want it to be.
- Instead of acrylic paint, use fabric ink. Acrylic paint will become rigid and wrinkled.
- Before stamping the material, wash it. Sizing is a coating that is sometimes applied to cloth, giving it a lovely feel but no real benefit.
- The use of custom rubber stamps to add your information to garments and fabrics is quick, simple, and affordable.
- The fabric ink is created specifically to cling to the cloth permanently and endure for at least 40 washes before fading becomes visible.
Simple guidelines for stamping on fabrics
- Stretching fabric on cardboard after pre-washing and ironing. In new fabrics, this eliminates the sizing. By doing this, the ink is kept from washing out when the item is washed. You can skip this step if you’re making non-washable home décor.
- Crafter’s inks, acrylic paints, or fabric ink pads can be used as ink stamps. Acrylic paints can be softened with special additives to make them suitable for clothing.
- Apply even, forceful pressure when stamping the design. Permit to completely dry.
- Sections of line art-type stamp pictures can be painted with fabric paints or inks.
- With the sink’s flowing water, cleaning stamps are simple. Paint that is difficult to remove can be removed with an old toothbrush or a vegetable brush. Blot to dry.
- Before wearing and/or washing, heat set the fabric with the hottest iron you can find or by running it through the dryer for 20 minutes on high.
- The easiest approach to make sure that your stamp comes out as it should each time when stamping on fabric is to learn how to do it correctly because it’s so simple to make a mistake and destroy the impression.
- If you’re using a smaller stamp, simply dab the ink pad rather than stamping directly into it to get an even image. However, if you’re using a larger stamp, turn the stamp’s actual side over and place the ink pad next to it. Next, lightly tap the pad across the stamp to spread the ink throughout the entire surface.
- Always make a few test impressions before stamping down on the fabric you intend to use to make sure everything is to your liking and to determine whether the amount of ink used will be sufficient, excessive, or if you’ll need to use more. Always iron your finished fabric before creating the impressions.
- Always wash and dry the cloth before using it, and choose a tightly woven, flat piece when you use custom rubber stamps rather than commercial ones. When it comes to fabric stamping, these items produce the best results, particularly cotton fabric and pillowcases in light colours.
- Pre-inked rubber stamps for fabrics are also very easy and convenient to use on fabric if you want to stamp small pieces of information, designs, and patterns on the fabric.
- Pre-inked rubber stamps cling rubber, or clear material can be used with paints, markers, or inks made for textiles.
Conclusion
Once you know the use of custom rubber stamps on fabric is really simple. All you really need to get started are the standard pieces of equipment (cotton or linen fabric, fabric ink, and a stamp). Just keep in mind to enjoy yourself and not make things too complicated as you start out on this new DIY path. A quick and easy technique to create designs and patterns on fabric is to use a stamp.
Fabric printing, at its most straightforward, is made possible by stamping. If done correctly, these designs can compete well with those on fabrics that have been professionally printed. No painting ability, sketching ability, or labour-intensive tasks are necessary if you have personalized fabric custom rubber stamps, you are all set for a fun-filled fabric stamping experience.
FAQS
- What is the use of custom rubber stamps for fabric printing?
You can opt to add a creative touch to your cloth by having custom rubber stamps printed on it.
- What are the basic materials required for fabric stamping?
All you need is a piece of fabric, bespoke rubber stamps, and fabric ink; other supplies may be needed for precise fabric stamping.
- Do you require any skills in fabric stamping?
If you have personalised fabric custom rubber stamps, you are ready for an enjoyable experience of fabric stamping without the need for painting, sketching, or labour-intensive jobs.
- What are the important tips for fabric painting?
Before stamping down on the fabric you wish to use, always create a few test impressions to ensure everything is to your liking and to ascertain whether the amount of ink used will be adequate, excessive, or if you’ll need to use more.


